
Last Updated: October 25, 2026
Quick Summary
Artisan coffee roasting is the craft of turning raw green coffee beans into drinkable coffee using controlled heat, airflow, and timing. You heat small batches, watch the beans change color and sound, then cool them fast. Beginners can start on a hot air popcorn popper or stovetop pan before moving up to a drum roaster.
- A hot air popcorn popper is the classic entry point, giving even roasting and easy-to-hear first crack.
- Every roast moves through three phases: drying, browning, and development.
- First crack runs roughly 60 to 90 seconds as individual beans pop at slightly different times.
- Most home roasts take 8 to 15 minutes, depending on your equipment and batch size.
- Cool beans immediately after dropping, because carryover heat keeps cooking them.
Table of Contents
- What the Artisan Coffee Roasting Process Actually Involves
- Choosing Coffee Roasting Equipment for Beginners
- Coffee Bean Selection: What Green Beans to Buy First
- Coffee Roasting Stages, From Yellowing to First Crack
- How Long to Roast Coffee Beans and How to Read the Data
- Smoke, Chaff and Ventilation: Safety Before Your First Batch
- Troubleshooting Roast Defects and Fixing Your Next Batch
- How to Store Fresh Roasted Coffee Beans After Roasting
- Frequently Asked Questions
What the Artisan Coffee Roasting Process Actually Involves
Artisan coffee roasting is the craft of turning raw green coffee beans into aromatic, drinkable coffee using controlled heat, airflow, and timing. At Kona Crown Coffee, we roast small batches on our family farm. You heat beans, watch them change color and sound, then cool them fast. That is the core loop. The rest is learning to read the cues.
Choosing Coffee Roasting Equipment for Beginners
The best beginner roaster is the one that lets you control heat and see the beans. You do not need expensive gear to start. A hot air popcorn popper or a stovetop pan will teach you the fundamentals for under a few hundred dollars.
Budget Options: Popcorn Popper and Stovetop
A hot air popcorn popper is the classic entry point. It moves beans with hot air, which gives even roasting and makes first crack easy to hear. A stovetop pan or a hand-cranked whirley pop works too, though you must stir constantly to avoid scorching.
- Popcorn popper: Fast, cheap, good airflow, small batches
- Stovetop pan: Manual control, requires constant stirring
- Whirley pop: Even agitation, works on a kitchen stove
When to Move Up to a Drum Roaster
Move to a drum roaster when you want repeatability. Drum roasters hold heat steadier and let you log bean temperature and rate of rise. That data is what lets you repeat a great roast instead of guessing. Start small and scale up only when your batches feel consistent.
Specialty Coffee Association home roasting guidance
Coffee Bean Selection: What Green Beans to Buy First
Buy fresh green coffee beans from a single origin you can trace. Freshness and moisture matter more than fancy packaging. Look for beans with a recent harvest date and even color.
green coffee bean grading and storage standards
If you want a bean that roasts beautifully and carries a clean, balanced profile, our 100% Kona Coffee Green Estate Beans for Home Roasters are State-certified and graded for home roasting.

Coffee Roasting Stages, From Yellowing to First Crack
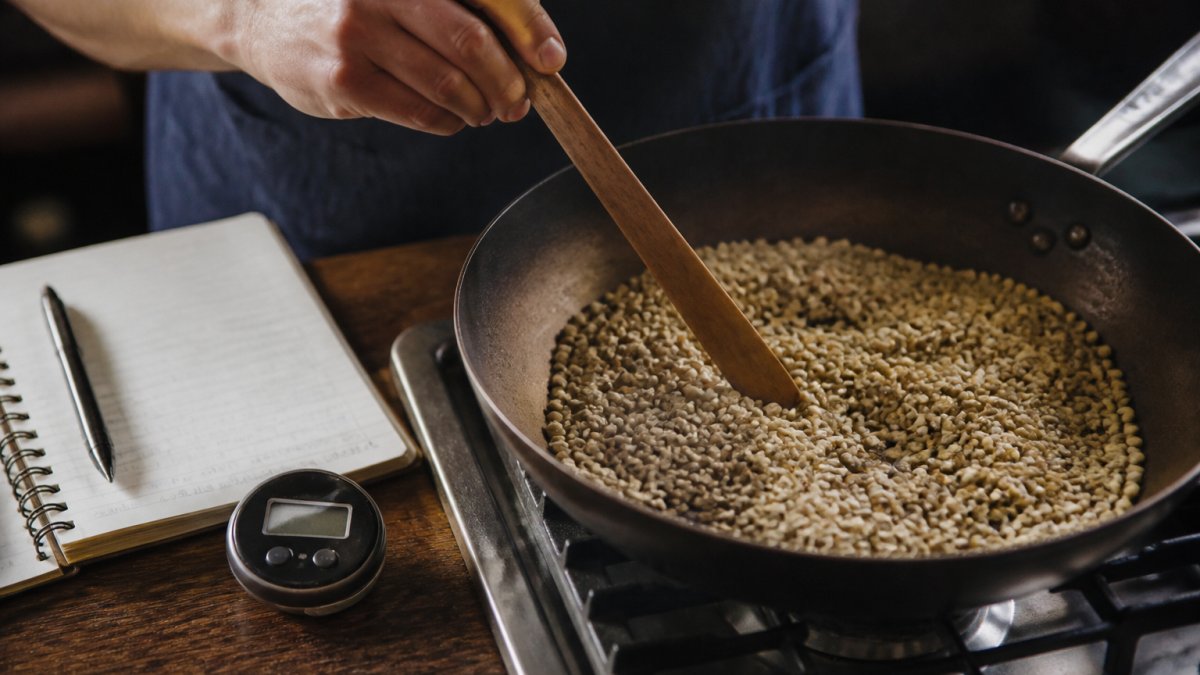
Every roast moves through three phases: drying, browning, and development. The beans lose moisture, shift from green to yellow to brown, then crack as they expand. Learn these stages and you can control flavor instead of hoping for the best. The cues below repeat closely enough from batch to batch that you can use them as checkpoints even on a popcorn popper or stovetop setup.
The Turning Point and the Drying Stage
The turning point is when bean temperature stops falling and starts climbing. On a drum roaster with a bean probe, you will see the reading drop for the first 30 to 90 seconds after charging, then reverse.
The drying stage follows. Beans lose surface and internal moisture and shift from green to yellow. Keep the heat steady here.
Yellowing: The Cue Beginners Miss
Yellowing is the moment the whole batch turns from green to a pale yellow. It is the clearest visual signal that drying is finishing and browning is about to start. Watch for two things: the color should be even across the batch (patchy yellow means uneven airflow or an overloaded roaster), and the smell should shift from grassy to bready.
Browning, Caramelization and Development
During browning, sugars caramelize and the bean darkens from yellow to tan to brown. This is where most of the flavor compounds form. Then comes first crack, a popping sound like popcorn. That sound signals the development phase, where you decide how light or dark to go. Pull the beans earlier for bright acidity, later for deeper body.
First Crack: How to Recognize It
First crack is the loudest, most reliable cue in home roasting. The beans have built up steam and pressure, and the structure fractures with an audible pop. On a popcorn popper it sounds like the popping of popcorn; on a stovetop pan it is a sharper crackle. Two things to know:
- It is not a single moment. First crack runs for roughly 60 to 90 seconds as individual beans pop at slightly different times. Note the start, not the end.
- It is easy to miss indoors. A range hood, an open window, or a loud kitchen can mask it. Keep your head near the roaster for the first few batches, or use a probe to watch for the temperature plateau that often accompanies it.
After first crack ends, you are in development. The gap between the end of first crack and when you drop the beans is your development time. A short development (under a minute) tends toward bright, acidic, sometimes grassy coffee; a longer development (two to three minutes) tends toward rounder body and deeper sweetness. There is no universal right answer, the point is to pick a target and repeat it.
100% Kona Coffee Green Estate Beans for Home Roasters - Hawai'i State Certified →
Second Crack (and Why Beginners Should Stop Before It)
If you keep roasting past first crack, you will eventually hear a quieter, faster crackling, second crack. It signals the beans are entering dark-roast territory, where origin character fades and roast flavor dominates. Most beginners should stop before second crack while learning, because the window between first and second crack is where you can taste the difference your adjustments make.
Specialty Coffee Association home roasting guidance
How Long to Roast Coffee Beans and How to Read the Data
Most home roasts take 8 to 15 minutes, depending on your equipment and batch size. The exact time matters less than the checkpoints. Log bean temperature, environment temperature, and the time of first crack. Watch your rate of rise, the speed at which temperature climbs. A steady rise gives even flavor. If you track these numbers, you can repeat a good roast and fix a bad one.
A Repeatable First-Batch Recipe
Use this as a starting point, then adjust one variable at a time. It assumes a small batch, roughly 3 to 4 ounces of green coffee on a popcorn popper or stovetop, or the smallest batch your drum roaster allows.
| Checkpoint | Approximate Time | What to Watch | Why It Matters |
|---|---|---|---|
| Charge | 0:00 | Beans go in; temperature drops | Marks the start of the roast |
| Turning point | 0:30-1:30 | Temp stops falling, starts rising | Start of drying |
| Yellowing | 3:00-5:00 | Even pale yellow, bready smell | Moisture leaving the bean |
| First crack start | 7:00-10:00 | Loud popping begins | Development phase starts |
| Drop | 1-3 min after first crack | Color and smell match your target | Stops the roast cleanly |
| Cooling | Immediately | Beans cool fast, stirring or forced air | Halts carryover cooking |
Treat the times as ranges, not rules. A popcorn popper often runs faster (first crack closer to 6 or 7 minutes); a drum roaster with a larger batch may run slower.
Reading Rate of Rise
Rate of rise (RoR) is how fast bean temperature is climbing, usually expressed in degrees per minute. A steady, gently declining RoR through the roast is the pattern most practitioners aim for: fast early, slower as you approach first crack. A RoR that spikes late often means you pushed heat too hard and risk scorching; a RoR that flattens or crashes means the roast is stalling and may taste baked.
Cooling and Carryover
When you drop the beans, they keep cooking from residual heat until they cool. That is carryover, and it is why cooling fast matters. On a stovetop, transfer beans immediately to a colander or sheet pan and stir or blow air across them. On a drum roaster, run the cooling tray until the beans are close to room temperature.
Resting, Degassing and Brew Timing
Fresh-roasted beans release carbon dioxide for several days. Brew too soon and the gas interferes with extraction, producing flat or foamy results. Store them whole in an airtight container away from light and heat, and grind just before brewing. If you want a deeper walkthrough, see our guide on how to store fresh roasted coffee beans.
green coffee bean grading and storage standards
Smoke, Chaff and Ventilation: Safety Before Your First Batch
Roasting makes smoke and chaff, so plan for airflow before you start. Chaff is the papery skin that sheds off the beans. Smoke builds fast, especially in a kitchen. Roast near a window, under a range hood, or outdoors. Keep a fire-safe surface under your roaster and never leave a batch unattended. Watch out: roasting indoors without ventilation can set off smoke alarms and leave a lingering smell for days.
Troubleshooting Roast Defects and Fixing Your Next Batch
Most roast defects come from uneven heat or rushing the batch. Baked beans taste flat because the roast moved too slowly. Scorched beans show dark patches from too much direct heat. Tipped beans have burnt ends from high starting heat. Fix these by preheating your roaster, stirring more, and keeping batch sizes small. A common mistake is overloading the roaster, which blocks airflow and causes uneven roasts.
How to Store Fresh Roasted Coffee Beans After Roasting
Store fresh roasted beans in an airtight container away from light, heat, and moisture. Keep them whole and grind just before brewing. For deeper guidance, read our guide on how to store fresh roasted coffee beans and our tips on storing Kona coffee beans for lasting freshness.
Frequently Asked Questions
What are the five stages of coffee roasting?
The five coffee roasting stages are drying, yellowing, browning (caramelization), first crack, and development. Green beans lose moisture during drying, shift from green to yellow around the turning point, then brown as sugars caramelize. First crack marks the audible pop when built-up steam and gas escape the bean. Development is the window after first crack where you decide roast degree, from light to dark. Logging each stage by time and bean temperature is what makes a roast repeatable.
How long does it take to roast coffee beans at home?
Most home batches finish in 8 to 15 minutes depending on equipment and batch size. A popcorn popper runs fast, often 6 to 10 minutes, while a drum roaster gives you more control across a 10 to 14 minute profile. Watch bean color, sound, and smell rather than the clock alone.
How long should freshly roasted coffee rest before brewing?
Freshly roasted coffee releases carbon dioxide, which can make a pour-over bubble and stall or an espresso shot run unevenly. Store beans in a sealed, opaque container at room temperature, not the fridge.
Can you roast coffee beans in a home oven?
You can, but it is the least controllable option. An oven heats unevenly, smoke builds up fast, and chaff stays mixed with the beans. If you try it, use a perforated pan or cast-iron skillet, keep the batch small, and stir often. Most beginners get better results from a popcorn popper or a stovetop pan, and both cost less than replacing a smoke-damaged oven. Ventilation matters either way.
Roasting at home takes practice, but the payoff is coffee that tastes fresh and truly yours. If you would rather skip the guesswork, Kona Crown Coffee roasts small batches weekly on our family farm and ships straight to your door with 2-day FedEx. Our award-winning 100% Kona coffee, certified by the State of Hawaii, delivers the freshness and heritage flavor that home roasters chase. Get started with Kona Crown Coffee and taste the difference fresh, single-origin Kona makes in your cup.
